In addition to the solo show at the Modern Eden Gallery in SF, I have also been working on a major piece for the Christopher Queen Gallery in Duncan Mills for the Hand Crafted Frame show.
"Camelia Roses", 12x24 Oil on Linen Board.
Let's walk through this piece a bit.
It started off as a piece I began painting at the Marin Art and Garden Center in Ross, CA. On the first day I realized exactly how much work was going to be involved. The second day I had it pretty much blocked out. I had taken a bunch of different photos of the section of the rose bush I was painting from, trying to do my best to match in my camera what I saw in front of me. Using Photoshop I was able to get reasonably close enough to be able to do the rest of the painting in studio. I worked a lot like I was painting it from life at home. I spent a few days on finishing it, then once it was dry I glazed over the darks behind the main foliage to reinforce the composition I set up. I also glazed an extra coat of the cool red color over the flowers to intensify that saturated crimson that's almost impossible to achieve through alla prima painting alone.
Ok, now on to the frame!
I started off by taking a used frame from a previous show and basically sanding it down to the wood. I then gessoed the frame with numerous coats of acrylic gesso mixed with wood filler to make sure it was impervious to whatever I was about to throw down on it.
Inner Frame:
Once I gessoed this part of the frame I layed down a burnt umber undercoat and let that dry. Next I blocked in all 40 (count em) flowers that I had photographed for reference. Note: I had to do some plastic surgery on most of these flowers; a lot of the petals were kinda chewed up. Once I finally finished painting the flowers, I masked off the areas I didn't want to cover over with the green undercoat. After that dried, I used Brush 'n' Leaf liquid gold leaf to paint in the filigree and border.
Outer Frame:
I painted on top of the initial gesso a dark earthy red made from acrylic and casein color. This was going to be the base I would lay down the gold leaf on top of. In between the gold leaf I put a layer of Rub&Buff to see if it would be brilliant enough for my liking. As I expected, it wasn't, so I brushed on the adhesive for the gold leaf. If you've never done any gilding before, it can be a pain in the ass. I tried it once for a small piece and failed miserably at it. If it folds up it's super-hard to unfold it and lay it down smoothly again. I just decided to go for a slightly more distressed look since it wasn't going to be perfect. I'd say the best way to do it would be to cut your squares up into small pieces and go slowly but steadily. Once it touches the adhesive it's not coming off. Once I covered the entire surface I wanted to, I used a bit of nail polish remover to get rid of excessive adhesive. Finally I brushed on a couple of coats of sealer and called it a painting....
The show:
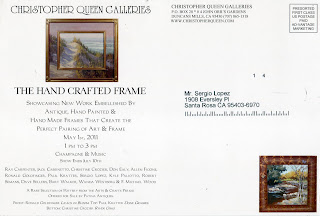
When I delivered my piece I saw a few of the other pieces. One of the most clever ones I thought was the one that Paul Kratter did, which is in the flier there. He extended the painting into the frame itself. If you get a chance to check it out, it should be an interesting show.
THE HANDCRAFTED FRAME
Showcasing New Work Embellished By
Antique, Hand Painted &
Hand Made Frames That Create the
Perfect Pairing of Art & Frame
May 1st, 2011
1 pm to 3 pm
Champagne & Music
Show Ends July 10th
•
Sign up for the newsletter: Get new art with each website update, and stay in the know for art shows and events!


0 comments:
Post a Comment